Monday, 13 April 2015

PARTY : Pudding Cookie Moon Stripes

Hello.

Once again exams are round the corner, well, 5 days away in fact. But we still need to have some fun! Pudding recently turned 11 and since my family hasn't celebrated our other pups' birthdays for EVARRR so why not let them have a little party! Actually, I just want to put party hats on them and feed them cake.

It's a good time to celebrate especially since Stripes just recovered from surgery and that's a pretty big achievement! If you had seen the state she was in when she fell ill... You would be as amazed as I am at the rate she has come back to the pink of health. Our vet, Dr Chong, even told me I had to be mentally prepared as her condition was so bad she may pass on. Damn you corn cob! For those who don't know, Stripes had a corn cob lodged in her small intestine that made her so uncomfortable, she refused to eat or drink, and landed her in the hospital. 

I actually have a photo of the corn cob that was sent to me from Dr Chong, you guys can have a look if you're interested. The following photo is not for the squeamish, I'll make it smaller just in case someone decides it's too much to handle.


That's the corn cob and the segment of the small intestine that had to be removed along with it. I was pretty surprised that whole bit of the intestine had to be removed as well, but turns out it's necessary as the corn cob, being stuck there for some time, resulted in that section becoming inflamed. So to have the best chances of a speedy recovery, healthy tissue would be key to the healing process! We learn something new everyday. 
So now with a shorter length of intestines, Stripes' appetite has come back full fledge, as piggish as ever. 

Now let's move on to the fun part to get that rotten corn cob and 'san zam ba' image out of your mind.

PARTY! 


Doggeh cake in the making

Doggeh cake assembled and ready!


I followed a really simple recipe for their cake but I made some adjustments!
1) Doubled the recipe
2) Didn't double the honey so it remained at 1/3 cup. Don't think dogs should have too much sugar.
3) Used cream cheese for the frosting!

Recipe: Peanut Butter and Carrot Cake


Time for the pups to take the stage  c:


老大 Pudding, beaming her best smile even though she hated the party hat.
She already got at a bit of the cake earlier, I guess she's pretty pleased with herself.


老二 Cookie, being all indifferent about the whole party.. 


老三 Moon, our handsome boy with some cream on his whiskers


小妹 Stripes, our big baby that only had eyes for the cake.

Oh my goodness, it was such a challenge to get them to stay still for me. Let alone have them look at the camera when there was a cake in front of their faces. Patience is a virtue ~ 

I initially thought I could take a family photo with all of them in one frame, sitting still, hats on and all looking at the camera. I thought I was a wizard. I thought wrong. But these are really lovely individual photos of them. Captures their personalities quite well I would say!

Here we some of their greedy cake faces ヾ(●ω●)ノ


I think I did well with the cake, judging by how well it was received *beams*
I made it with love (* _ *)

And here's a little video I made of the day's festivities. ENJOY.


HD and full screen for best results hor

Couldn't have pulled it off without the help of some of my humans. My mother who helped restrain the cake hungry pups, my helper Ba Ginting who helped distract the big pups while the little pups had their turn at the cake and Jasper who helped me with photography and videoing of our little event (●´∀`●)


Looking haggardly and squishy armpit-y.
 Toodle doo ~ Till next time
!


再见


Tuesday, 2 September 2014

Lazy Tuesday: Egg Salad Hotdog Buns

Hello humans.

How warm is this afternoon. Well my holidays are about to end in a couple of days and I am not looking forward to the hellish first week of intensive lecture at all.. I don't get how people can get bored of the holidays.

Aside from the idea of school lurking around the back of my mind life's been pretty good, peaceful days filled with pleasant activities. I feel emotionally fresher, does that make sense? It doesn't mean i'm in some kind of awakened state or anything, it just feels lighter inside. Sometimes you can get to feeling a little boggy.. it's not all bad but it ain't good either! I could attribute this refreshing feeling on my insides to the herbal water I just drank but I'd like to think it's due to the holidays. Oh magical holidays ~ And of course to the flow of my life.

I recently tried something very new and very exciting I must say but I'll leave that for a post on its own. I really should get to updating this space more often, probably not all on full recipes 'cause those are a pain in the boop. Partial and skimpy ones perhaps may still be doable, unless I really have nothing better to do. But what's better, everything is only relative.

Now, let's take a look at what I got up to today. I spent the whole afternoon putting this piece of scrumptiousness together and it was worth every minute. A hot dog bun smothered with egg salad and seaweed strewn over it was just what I pictured in my head a few moments before I headed for bed, and beholddd the art of manifestation ~ That thought probably resulted from me being deprived of Tako Yaki.. Went to town last week with Jasper with the sole purpose (my sole purpose) of grabbing some Tako Yaki, be it from Tako Pachi at Taka or Gindaco at Ion but woopdeedoo Tako Pachi is GONE oh my dear childhood favorite *cries* and Gindaco is ' Coming Soon! '. Is my life a lie, how is it ' Coming Soon ' now when it was.. Already there?! *grumblestoselflikeacrazycatlady* Oh and that's the herbal water I mentioned earlier, it's pretty good if you're into drinking soda water just like that. I'm not but the herbs got me.


I actually made the buns from scratch, I'll leave the recipe.
☞ Homemade Hot Dog Buns

I halved the recipe as well because, well,  what would I do with 18 hot dog buns? I don't have enough humans to feed. This dough actually required some kneading but that's gonna leave a bigger mess than intended on the countertop so i decided to cheat and use the dough hook instead. I once saw a recipe for hot dog buns that mentioned that the dough is ready when it doesn't stick to the side of the mixer and is nice and stretchy so that was my guide to avoid having to knead.


An hour to proof and get puffy.


Cut them straight out of the container and shaped them into the standard hotdogbun shape.


After an egg wash and a sprinkling of salt flakes and pepper.


After the second proofing


Made my egg salad which is basically just boiled eggs and mayo. I would say the secret to a good egg salad is in the mayo, Kewpie mayo for life *grunts*

Rough guide: 1 egg - 1 Tbsp Mayo (Probably on the excessive side)


Fresh hot dog buns out of the oven ~ They're not as soft as the regular asian milk breads but I'll take it anyway. It has a more rustic feel to it and I like that.


Assembly! All that and slather of dijon mustard mmhmmm. My sausages were boiled, if anyone was wondering *winkwink*


Tadahhhh


Devoured it like I haven't eaten for days, egg mayo dribbling everywhere. I am not proud but I am happy.

Toodle doo see you soon.

再见


Thursday, 15 May 2014

COOKS: Smoked Salmon and Spinach Quiche

Hello hello! 

It's been some time! There are so many recipes I want to share but most of the times I tend not to go with the given recipes strictly and it's quite a chore to note down all the different measurements.. I try I try. I doubt I would have gravitated towards making a smoked salmon quiche if not for the excessive amount of leftover smoked salmon in my fridge but I'm glad I gave it a go! Not regretting one bit, it was really tasty and filling as well so just a slice would be good enough for a hearty breakfast. 

Oh and when your quiche is done, remember not to be a 'kanchiong spider' (hasty) *lol* and take the quiche out of the pan while it's still very hot, the filling and the crust are probably still soft and haven't had time to set so it'll smoosh when you flip it onto a plate. And yes, I was a kanchiong spider so don't do what I did! Thankfully I was able to salvage it, you can see how my crust is all broken up in the last picture. You wouldn't want a smooshed quiche after all the hard work you put into it, I really wanted to punch myself in the head at that moment in time, so much. 

My references!

☞ Pie Dough

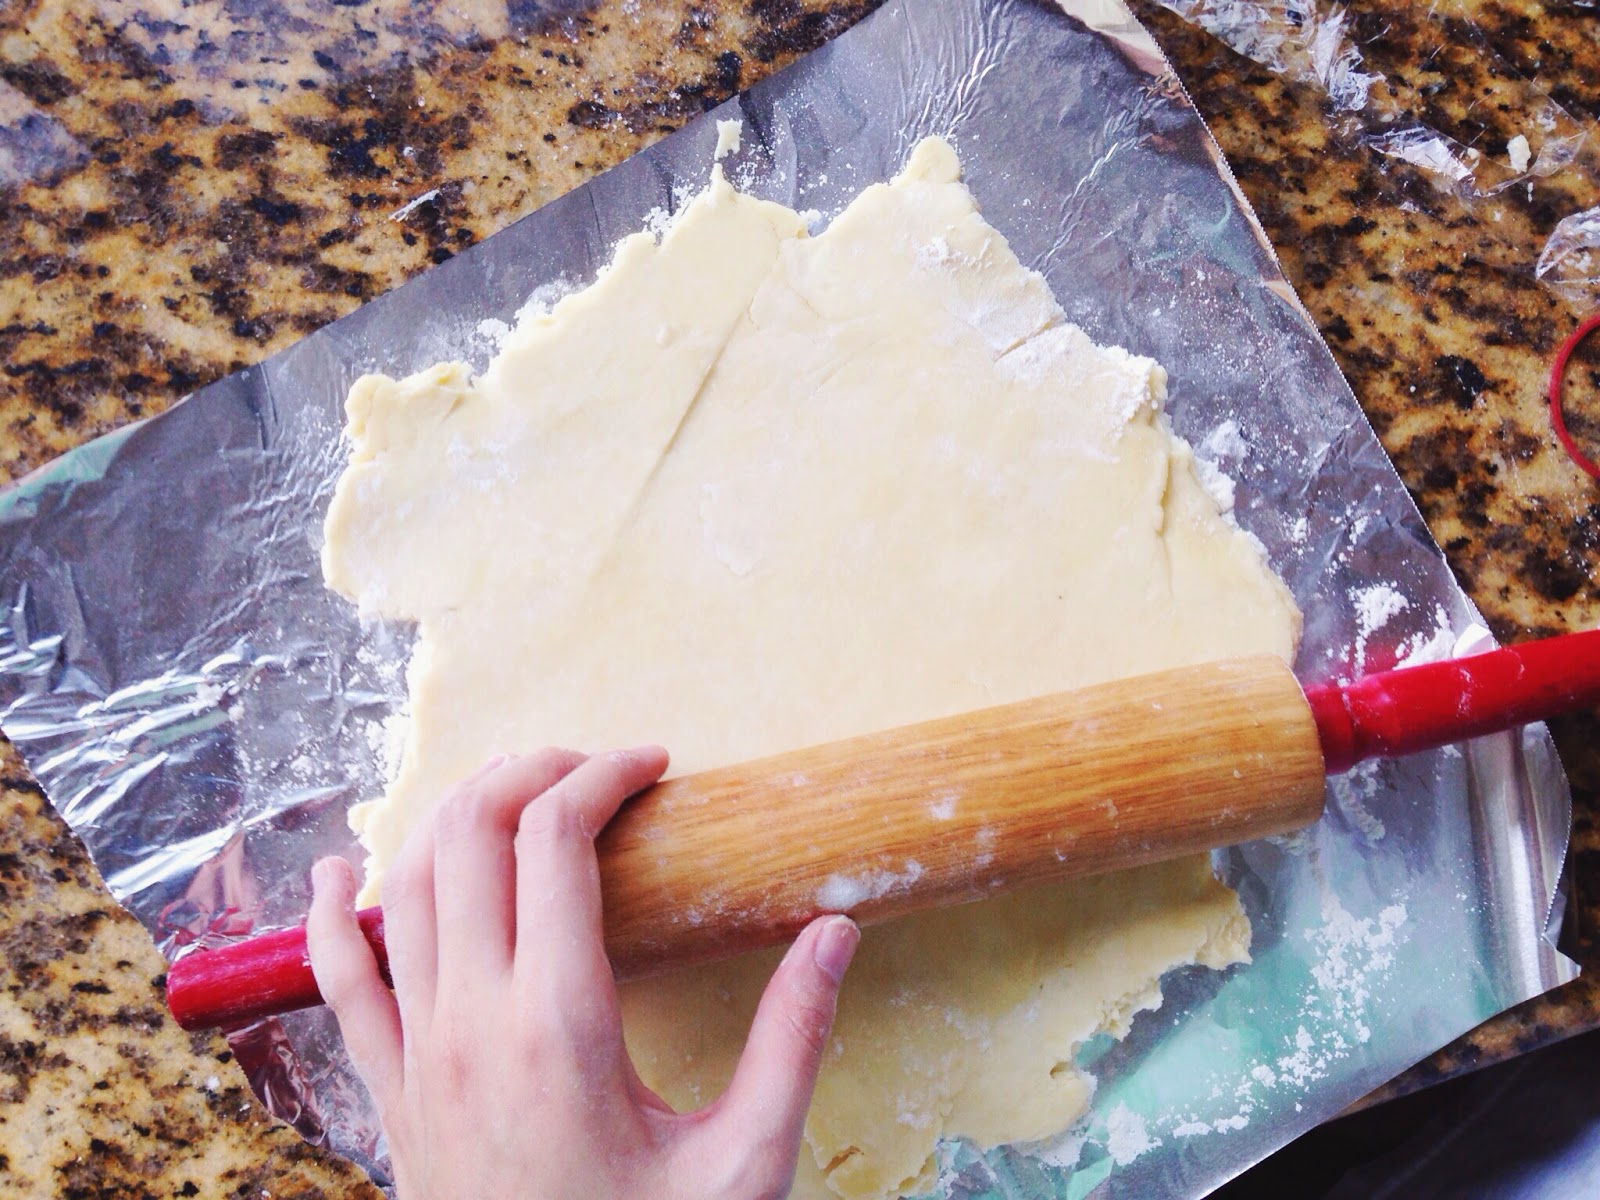
I failed at pie dough before so I stuck to the recipe reaaaaal close for this. I think it turned out pretty well though! I never knew I had a food processor in the kitchen and had always been mixing my chilled butter and flour with either a fork or my hands, to make things worse Singapore's weather is hot hot hot.. the butter really doesn't stay chilled for long. But with a food processor whiz whiz and it's all nice and crumbly! This is how it looks after a night in the fridge and some rolling pin action.


Mini non-stick egg pan perfect for frying up some shallots!


After all the prep work is done! Pie dough baked, shallots sautéed and spinach wilted! 
The recipe didn't call for spinach but I was afraid the quiche might a little heavy so I whipped some up for the sake of adding a vegetable-y component *twitchesnose*


And now to plop plop plop all the prepped ingredients into the crust!


I just loved how the colours were when I made the cream and egg mixture. The dill looked like mini pine needles and the colours were just so homely.. Homely like if I lived in a hobbit house in the woods. But yea, lovely!


So mix that up and pour it over everything else and it's time to pop it in the oven! 


Tadahhhh smelling delicious!


Salmon and Spinach Quiche

What you'll need:
  • Pie dough (Can use recipe mentioned above)
  • Olive oil
  • 4 medium shallots, thinly sliced (about 1/2 cup)
  • 4 ounces smoked salmon, chopped
  • 4 ounces goat cheese, crumbled
  • 3 large eggs
  • 1 cup milk
  • 1/2 cup cream
  • 2 Tbsp chopped fresh dill
  • 1 teaspoon lemon zest
  • 1/8 teaspoon freshly ground black pepper
  • 4 cups chopped spinach (Optional)
  • 1Tbsp minced garlic (Optional)
  • 1/2 cup milk (Optional)

1. Roll out your prepared pie dough into a circle that's about 5mm thick and make sure it's spread large enough to cover a 12inch pie pan. Once done, flip the pie dough onto the pie pan and press the dough down into the corners. Refrigerate for about 30 minutes to let the butter firm up again.

2. Preheat oven to 180°C. Place parchment paper over pie dough, pressing it into the corners and weigh it down with some baking weights. I used about 5 cups of white rice. Place in preheated oven and bake for about 15 minutes, remove from oven and allow it to cool for a couple minutes. Remove the parchment paper and poke holes in the base so air can escape and the crust doesn't puff up during baking without the baking weights. Put it back in the oven for another 10 minutes or so till it's lightly golden brown. Let cool on a wire rack without removing from pie pan ( I feel it holds its shape better this way and prevents the crust from falling apart when the wet ingredients are added)

3. Heat about a Tbsp of olive oil in a pan and add the sliced shallots. Cook the shallots till fragrant and caramelised then set aside.

(Omit this step if you don't want to have spinach in your quiche.) 
4. In the same pan add a little more olive oil and heat it up. Add 1 Tbsp of minced garlic and cook till fragrant. Add in chopped spinach and cook till wilted then add in milk and continue mixing till all the moisture evaporates and the spinach becomes nice and mushy. Set aside.

5. Whisk the eggs then whisk in milk, cream, dill, lemon zest and black pepper.

6. Line the quiche crust with cooked shallots then spread out spinach if using then smoked salmon and crumbled goat cheese. Space the ingredients nicely so you get an equal amount of each when you cut the quiche in slices when it's done! Once all the 'dry' fillings are added, pour in your egg mixture and swish the pan a little to guide the mixture into all the crevices and get rid or air bubbles. Transfer the quiche into the oven and bake at 180°C until just set for about 30 - 40 minutes. Remove from oven and let cool on a wire rack for about 15 minutes before serving to make sure the crust doesn't fall apart when you lift the quiche out of the pan. 


再见

Monday, 24 March 2014

COOKS: Tofu Avocado Creme Brûlée

Hello! 

We're beginning to see fresh cow grass sprouting already, wonderful mmm. Grey and rainy days always get me down but this time you know the flora and fauna are rejoicing, lots of good energy. Decided to make a simple little dessert to get some sweetness in my system because school's just painful.. 

This post is a little late because the wifi in my house just failed on all of us.. Or maybe it was cause I pushed the wrong button trying to reset it. Could be one or the other *shrugs* 

I was actually thinking of scrapping this post but now that i'm stuck at home eating porridge because i'm down with stomach flu and the rest of the family are in Swatow being awkward in a KTV lounge (awkward family gatherings you see), well, I figured finishing up this post would be more productive than watching back to back episodes of Oddities on the Science Channel. 

So here's my healthy, or should I say healthier, version of a Creme Brûlée. I think it does a good job when you're craving something creamy and rich, no baking required but you do need a blow torch that you can get from a cooking supplies store, a good one would be the ToTT Store at Dunearn Rd. I got mine from a wholesale metal smithing supplies store but I think it'll be easier to locate the former. 

First for some photos during the process ~


Brûlée!


Creamy Creme Brûlée with half the calories! I made that up, but I'm pretty sure my guess isn't too far off.

Here's my recipe for 4 adequately filled teacups of Creme Brûlée 

What you'll need:
  • Blender
  • Blow torch
  • 4 small heat resistant cups (you can use ramekins)
  • 2 ripe avocados (peeled pitted and diced)
  • 150g of silkened tofu (half a regular pack of silkened tofu from the supermarket)
  • 1 Tbsp of condensed milk
  • Juice of a small lime (mainly to keep the avocados from oxidising)
  • 1 Tsp vanilla extract
  • Approx. 3 Tbsp milk
  • Approx. 4 Tbsp sugar (for brûlée-ing) 

1. Put your avocados, silkened tofu, condensed milk and juice of a small lime into the blender and whizz away. You may notice it doesn't blend very well so stop blending and add in your milk a table spoon at a time, just enough for the whole mixture to start blending smoothly. When the whole thing becomes less chunky and gunky and more smoothie-like, add in your vanilla essence and give it a last round of blending to get the vanilla essence incorporated with the mixture. 

2. Pour the avocado mixture equally into 4 heat resistant cups and try to even out the surface with a small spoon, this makes it easier to brûlée/torch it later on. Put them in the fridge for about 2 hours to cool and get a little firmer. Try not to use cling wrap at this point of time as that traps the moisture and that makes it difficult for you to properly caramelise the sugar later on. 

3. After about 2 hours, remove your cups from the fridge. Pour on a layer of sugar, enough to cover the entire surface of your avocado mixture. Quickly now, turn on your blow torch and heat up the sugar, keeping the flame about 2 inches away from the surface. Go over the entire surface until the sugar starts to bubble and turn to a golden caramel colour, then turn off the blow torch. Keep in mind to work on one cup at a time, if you leave the sugar on the avocado mixture for too long before torching it, the sugar dissolves into the mixture and it won't give you that crunchy top no matter how long you torch it. 

And that's it! Really simple if you have all the equipment. Now back to slothing in bed, feeling a little light headed at the moment. 

再见

Friday, 14 March 2014

COOKS: Banana Cake

Hello! 

I'm back from Jakarta and I just spent the afternoon baking a banana cake! And I was also freaking out that my mum was missing since morning and no one knew where she was *gasp* but she's back, she's safe. OH and there was a monkey in the house! I didn't get to see it but apparently it stole some of our vegetables and scurried off. It's probably hiding somewhere in the bushes, monkey monkey. Okay now back to my banana cake it smells so amazing mm mmm ~ Cinnamon, coffee powder and bananas sure make a lovely combination of scents. I wouldn't mind smelling like a banana cake. I followed the recipe quite closely so I'll just leave the link here ☞ Banana Cake Recipe

I did tweak the recipe a little by reducing the amount of sugar from 3/4 cups to about 1/2 a cup and the sweetness was just right especially when the chocolate chips were so sweet. 
Another thing is, the original recipe called for really ripe bananas to be used but I didn't have really ripe bananas.. I even tried to speed up the ripening process by leaving my bananas out it in the sun but that didn't do much and I had to bring them in early because they might attract the monkey. (Not that I don't want to see the monkey though). Grr. I could smell bananas during baking but when I tried a slice I got mostly cinnamon and chocolate, not so much banana so yeap, really ripe bananas are essential!

Now for some photos. 

First, the results! 


Paired the cake with even more bananas! Caramelised with my Echire butter yum, the crunchy charred parts were extra tasty. The green concoction, by the way, is brown rice green tea with mint, basil, rosemary and agave nectar, it was good. Super refreshing.


Next, the process!


The dry stuff.


The wet stuff.


The mixing the wet stuff. That's my new hand mixer, it's fun.


The combining the wet and dry stuff.


The add some coffee powder and chocolate chips stuff.


The pour it into a greased tin stuff.


The done baking stuff! 

And that's that. My mum loves it and that's wonderful 'cause I made it mainly for her, she's always been requesting for banana cake so here's it! She likes to top her banana cake with cheese and toast it up so the cheese melts, seems like a strange combination but it's good. Bakeries in Jakarta often carry bread with banana and cheese so maybe it's an Indonesian thing? We're quite sure it would be good with some ice cream too!

On a side note: Oh man oh my Jasper's in Pulau Ubin and there's 15 more days till he gets to contact civilisation. Praying to the universe that all is going well for him! No jelly fish stings or scary things ~ 

再见

Wednesday, 19 February 2014

COOKS: Bacon Spinach Egg Cups

Hello there 

Today I made brunch for my family and it turned out pretty good! I referred to a recipe online for the Bacon Spinach Egg Cups but I didn't really follow it closely because it seemed like one of those recipes you can just improvise as you go along. Here's the recipe I referred to if you want to take a look ☞ Spinach Baked Eggs


Here's my recipe for 3 servings (my ramekins are approx. 8cm in diameter)

What you'll need:
  • 3 ramekins 
  • Approx. 8 cups chopped fresh spinach (loosely packed)
  • 3 eggs
  • 4 slices of bacon (chopped up)
  • 1 small red onion (diced)
  • 1 Tbsp chopped garlic
  • 1 Cup of cheese (I used mozzarella) 
  • 1 Tbsp olive oil 
  • Salt and pepper to taste
  • Baguette slices for dipping

1. Heat a pan up (needs to be pretty big because 8 cups of spinach is quite a bit) and add your 1 Tbsp of olive oil or enough to coat the pan. After it gets nice and hot, throw in your onions and sauté them till they start to sweat and then add in your 1 Tbsp of garlic and cook till fragrant. Then throw in your chopped bacon and stir till it gets slightly crispy, about 5 minutes on a medium fire.

2. Dump in your 8 cups of spinach and stir it till it gets smooshy and wilted. If your spinach isn't as soft as you'd like it and it's getting too dry, add some water and continue to cook till your desired softness. Once your spinach is soft and most of the moisture has evaporated, add your salt and pepper to taste. I didn't have to add much salt at all because the bacon was already salty so don't forget to taste!

3. Turn the fire off and stir in your 1 cup of cheese, or you can add more but remember cheese also has salt in it so try to maintain a balance. The remaining heat in the pan will melt the cheese but that's not very important because they still need to be baked in the oven.

4. Preheat the oven at 180 degrees celsius. Divide the spinach mixture into 3 ramekins and level it out. Crack one egg into each ramekin then place the ramekins onto a tray filled with some boiling water then proceed to put it into the preheated oven. This is to ensure that the surface of the eggs don't dry out. You can vary the cooking time now depending on how well you want the eggs to be done, mine took about 15 minutes. Keep a close watch, all ovens are different!

5. When the eggs are done take the ramekins out of the oven and prepare some toasted baguette slices for dipping! 

That's about it! If you'd like you can fry up some sausages or even more bacon to make it more complete as a meal but it tastes great on it's own as a light brunch. Will definitely do this again and I'll add more cheese and more bacon the next time round!
I'm quite certain I used about 8 cups of spinach but I just looked at the recipe I referred to and they only used 3 cups of chopped and frozen spinach to make 4 servings, isn't that queer. I'll just assume it's because frozen spinach is packed really dense?

再见

Monday, 17 February 2014

DIY: Moss Pots

Hello hello, 

Today i'm gonna show you how I made my very own moss pots! They're super cute and easy to care for. I was so excited when I first saw DIY tutorials for moss graffiti, here's a link to one of them ☞ DIY moss graffiti I think the videographer has some really unsteady hands or he just.. I don't know, likes to shake a lot. I mean how cool is it to just paint some gunk on the wall and KABOOM moss. But turns out it isn't as easy as it seems, apparently different types of moss like to grow on different things, some on rocks, some on soil and some perhaps on tree stumps, so it's best if you grow them on the things they like or they won't be very happy bunnies. Another reason being my mum won't let me use the blender for moss cause she's afraid we will all die of moss dirt poisoning from the contaminated blender. Enough rambling now for moss pots!

What you'll need: 
  • Moss
  • Peat moss
  • Small piece of wire 
  • Small piece of wire netting
  • Small pot


1. First you need some moss! So go moss hunting, my mum has lots of bonsai so it was easy for me to find some. Look how thick and velvety the moss is ahhhh ~ I'm not sure if it's illegal if you pick moss from the pavements along the road.. Probably not so that's probably one place you could get some. 


2. Next, you need to find a substrate for it to grow on. For me I got some peat moss which is just dead and dried moss. You can get some from a plant nursery or anywhere that sells gardening products. 


3. After you've got all  your materials ready, attach your wire netting to the base of your pot. This step is just to keep things from falling out through the hole at the bottom.


4. Lastly, put everything together! Peat moss then your moss lump! Remember to squish your moss lump snuggly into the pot so it's in contact with the peat moss. And that's it!

To take care of it spritz it with water regularly as moss thrives in humid weather and keep it out of direct sunlight 


Here are photos from today! I actually potted mine for some time already, if i'm not wrong it's been about a month and they're still alive and happy! Except one that has a little bit of mould growing on it so I've been putting it out in the sun more, hopefully that helps to kill the mould? Haven't found a method that gets rid of mould without killing my moss baby though.. 

再见